Solar Harness

SH-2Y-2B1 Branch

SUNTREE Power The SH-2Y-2B1 Branch use high quality materials that guarantee long-term reliability.Lower contact resistance and higher current transfer capability ensure high product effiiency.They were qualified in TUV&ETL labs with solar professional standards.The SH-2Y-2B1 Branch has passed both IEC1500V and UL1500V certifications. The waterproof rating is IP 68. It has UV resistant function.

IP 68

IEC 1500V / UL 1500

UL94-V0

UV Resistance

ORDER DATA
Type Cable Spec Connector Voltage
SH-2Y-2B1 4 mm² ~ 16mm² Customized 1500V
RELATED PRODUCTS
SH-6B1 Branch
SH-6B1 Branch

SUNTREE Power The SH-6B1 Branch use high quality materials that guarantee long-term reliability.Lower contact resistance and higher current transfer capability ensure high product effiiency.They were qualified in TUV&ETL labs with solar professional standards.The SH-6B1 Branch has passed both IEC1500V and UL1500V certifications. The waterproof rating is IP 68. It has UV resistant function.

SH-l Junction DC 1500V IJunction
SH-l Junction

SUNTREE Power The SH-l Junction use high quality materials that guarantee long-term reliability.Lower contact resistance and higher current transfer capability ensure high product effiiency.They were qualified in TUV&ETL labs with solar professional standards.The SH-l Junction has passed both IEC1500V and UL1500V certifications. The waterproof rating is IP 68. It has UV resistant function.

SH6 P Series Crystal Harness

SUNTREE Power SH6 P Series Branch Harness use high quality materials that guarantee long-term reliability. SH6 P Series Branch Harness have lP68 water-proof rating and can be used in a wide operating temperature range from -40℃ to 90℃.

RELATED NEWS
Guide to Installing MC4 Connectors on Solar Cable for Long-Term Reliability
Jun 17,2026
Guide to Installing MC4 Connectors on Solar Cable for Long-Term Reliability

You‘ve seen it on site. A string of panels tests fine at commissioning. Six months later, the thermal camera shows a hot spot at a connector. Another six months, and that connector has failed—arcing, melted plastic, a string down. The root cause? Almost always the installation. A conductor strand nicked during stripping. A crimp that wasn’t fully compressed. A gland nut left half a turn loose.

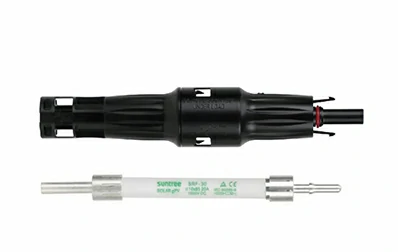
Here‘s the reality: a solar connector is only as reliable as the person who installs it. The Suntree PMCN40-CM is a rugged, UV-resistant MC4-style connector rated for DC 1500V and up to 40A, with IP67 protection when mated. But even the best connector fails if the installation is wrong. This guide walks through the complete installation sequence—from tools and cable preparation to crimping, assembly, and verification—so your connections stay reliable for the life of the array.


Tools and parts — don‘t start without these

Good installation starts with the right tools. Using the wrong crimper or a worn blade guarantees a poor connection.

What’s in the tool bag

  • MC4 crimping tool – A ratcheting crimper with hexagonal dies, capable of 1,500–2,000 lbs of force. Do not use a generic electrical crimper—the die profile is wrong for MC4 contacts.

  • Wire stripper – Designed for solar PV cable, with precise depth control to avoid nicking strands.

  • Multimeter – For continuity and contact resistance checks.

  • Torque wrench or torque screwdriver – For the gland nut (target: 3.4 Nm).

What you‘ll need on site

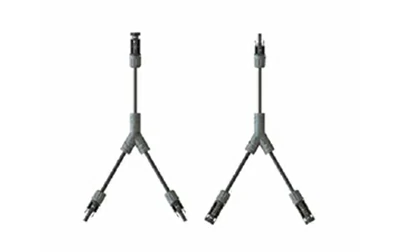
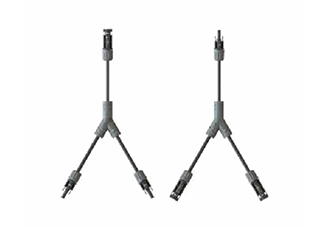
  • Suntree PMCN40-CM connector pair – Includes male and female housings, crimp contacts, sealing rings, and cable glands.

  • Solar PV cable – 2.5–10mm² (14–8 AWG), rated for 1500V DC.

  • Cable ties – For strain relief and cable management.

Get the cable ready — the right way

Cable preparation is where most installation errors begin. A nick in the conductor or a stray strand can create a hot spot that fails years later.

Strip it clean — no nicks

Strip 10–12mm of insulation from the cable end, depending on the connector brand. For Suntree PMCN connectors, the exact strip length is specified on the connector packaging. Use a wire stripper with the correct gauge setting—never a knife. A knife cut can score the copper strands, creating a weak point that breaks under vibration.

Three things to look for before you crimp

  • No nicked or cut strands – Hold the stripped end up to light. Any broken strands indicate a poor strip.

  • No oxidation – Copper should be bright and clean. If it‘s dark or greenish, cut back to fresh conductor.

  • Twist the strands – Gently twist the conductor strands together to keep them uniform before inserting into the crimp contact.


    The crimp — one shot is all you get

The crimp is the single most critical step. A poor crimp creates resistance, and resistance creates heat.

Get the wire in the barrel — all the way

Insert the stripped cable end into the metal crimp contact. The conductor should extend slightly past the crimp barrel—you should see a small amount of copper visible beyond the barrel. If it‘s too short, the crimp won’t grip the full length of the conductor. If it‘s too long, strands may protrude and cause shorts.

One crimp. That’s it.

Place the contact in the correct die position of the ratcheting crimper. Squeeze until the ratchet releases—this ensures full crimp force has been applied. Do not crimp twice. Double-crimping work-hardens the copper and can create stress fractures.

Look at it before you move on

A good crimp shows:

  • The crimp barrel is fully closed, with no gaps

  • No sharp edges or burrs

  • The conductor is visible at the end of the barrel but not protruding excessively

Give it a yank

Give the cable a firm pull—it should not separate from the contact. The industry standard pull test for MC4 crimps is 310 N minimum. If you can pull the contact off with moderate force, the crimp is unacceptable.


Putting it together — in the right order

With the contact crimped, the rest of the assembly is mechanical—but still requires attention to detail.

Don’t forget the seal

Before inserting the contact into the housing, slide the cable gland and the sealing ring onto the cable. The order matters: gland first, then seal. If you forget either, you‘ll have to cut the crimp and start over.

Push until it clicks

Push the crimped contact into the connector housing until you hear a distinct click. The contact is fully seated when it locks into place and cannot be pulled back out. For the PMCN series, the snap-in locking system is designed for secure engagement.

Tighten it right — not too much, not too little

Slide the cable gland forward and thread it onto the connector housing. Hand-tighten first, then add 1/4 turn with a torque wrench. The recommended torque for MC4-style connector gland nuts is 3.4 Nm. Over-tightening can damage the seal; under-tightening allows moisture ingress.


Prove it works before you walk away

A connector that passes visual inspection can still fail electrically. These checks catch problems before they become field failures.

Does the signal get through?

Use a multimeter to verify continuity from the exposed conductor at one end of the cable to the contact pin at the other end. No continuity means the crimp didn‘t make contact.

Measure the resistance — catch a bad crimp

For a more thorough test, measure the resistance across the crimped connection. The PMCN series specifies contact resistance of <0.35 mΩ. Higher resistance indicates a poor crimp.

Look for gaps

Inspect the assembled connector for:

  • No gaps between the gland and the cable jacket

  • The sealing ring is seated and not pinched

  • The housing halves are fully mated with no visible gap


    Three problems installers run into

Q: No click? Something‘s not seated

If the male and female connectors don‘t snap together with an audible click, the contacts aren’t fully seated. This usually means the crimped contact wasn‘t pushed all the way into the housing. Remove the contact (using the release tool), reinsert it fully, and try again. A connector that isn’t fully mated has higher contact resistance and is vulnerable to water ingress.

Q: Squished too much or not enough — how to spot it

Under-crimped contacts show visible gaps in the crimp barrel—you can see light through the seam. They also fail the pull test easily. Over-crimped contacts show stress fractures or cracking at the crimp edges, or the conductor strands may be crushed and splayed. The correct crimp has a smooth, closed barrel with no gaps and no fractures. Suntree PMCN contacts are designed for use with standard MC4 crimping tools; using the correct die is essential.

Q: Reuse the connector? Better not

Generally, no. Once a crimp contact has been inserted and then removed, the locking tang is often deformed. The seal may also be compromised. For a reliable installation, use a new connector if you need to redo the assembly. The cost of a new connector is far less than the cost of a field failure.


Your final sign‑off list

Before you close out a string or a combiner box, run through this checklist:

  • Cable stripped to correct length (10–12mm)

  • No nicked or cut conductor strands

  • Crimp made in one stroke with ratcheting tool

  • Crimp barrel fully closed, no gaps

  • Pull test passed (310 N minimum)

  • Contact inserted until click heard

  • Gland nut torqued to 3.4 Nm

  • Male and female connectors mate with audible click

  • Continuity verified with multimeter


     How Suntree‘s PMCN series supports reliable installation

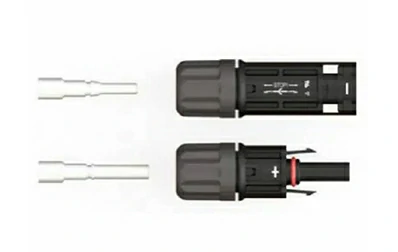
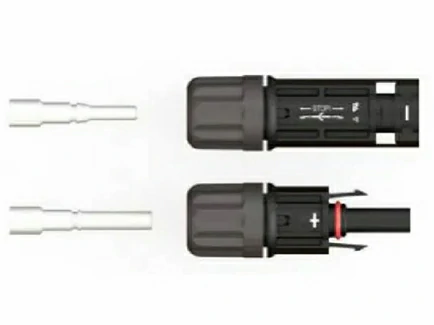
Suntree’s PMCN40-CM is an MC4-style solar connector designed for professional PV installations. Rated for DC 1500V with current capacity up to approximately 40A, it suits 2.5–10mm² (14–8 AWG) solar cables. The connector uses crimped copper, tin-plated contacts for low contact resistance (<0.35 mΩ) and snap-in locking housings that provide a secure mechanical and electrical connection. When mated, the IP67 rating delivers dependable performance in harsh outdoor environments.

The connector body is made from PPE/PC/PPO insulation material with a temperature range of –40°C to +85°C, covering extreme environmental conditions. The UV-resistant housing maintains its mechanical properties even after years of direct sunlight exposure.

For installation crews, the PMCN series is designed for simple on-site processing with standard photovoltaic crimping tools. The keyed housings ensure correct polarity mating, reducing the risk of reverse connections.

Before you install your next string of connectors, take five minutes to review this guide with your crew. One poorly installed connector can take down an entire string—and the cost of that downtime far exceeds the cost of getting the installation right the first time.

Need MC4 connectors or installation support for your next solar project? Contact Suntree for a quote on the PMCN series 1500V DC PV connectors. Share your cable gauge (2.5–10mm²), required quantity, and project voltage—their team can provide product specifications and installation guidance for your site.

Frequently Asked Questions About Solar Harness in Large-Scale Installations
Jun 12,2026
Frequently Asked Questions About Solar Harness in Large-Scale Installations

You’ve managed a large solar project before, so you know the drill. The field crews arrive, the modules are racked, and then comes the tedious part: cutting thousands of cables to length, stripping insulation, crimping connectors, and testing every single connection. On a 100 MW site, that’s weeks of labor, miles of wasted wire, and countless opportunities for crimping errors that show up years later as hot spots and system downtime.

solar harness changes that equation entirely. Instead of field fabrication, every cable is cut, stripped, terminated, and tested in a controlled factory environment. The harness arrives on site labeled, coiled, and ready to lay out. This article answers the ten most common questions EPCs and procurement managers ask when considering pre-assembled solar harnesses for utility-scale and commercial PV installations — from cost comparisons to certification requirements, custom design to long-term maintenance.


What a pre‑assembled harness actually is — and isn’t

Let’s clear up the most basic question first. A solar harness is not just a bundle of cables tied together with zip ties — though that’s what some suppliers deliver. A proper pre‑assembled harness is a factory‑manufactured wiring assembly where every cable is cut to exact length, stripped, terminated with connectors, and electrically tested before it leaves the production floor.

The alternative is the traditional approach: on‑site assembly. Crews measure each string length, cut bulk cable spools, strip the insulation using handheld tools, crimp connectors with manual crimpers, and then test each connection with a multimeter. This process introduces variability: crimping pressure varies by operator, torque settings drift, environmental dust contaminates exposed conductors, and inaccurate cutting creates material waste.

A harness eliminates all of these variables. Machine‑crimped connectors achieve consistent mechanical pull‑off force spec after spec. Factory‑level insulation resistance and continuity testing catch faults before the harness ships, not after it‘s buried under modules. And because the assembly is pre‑labeled and laid out according to the site plan, installation becomes a matter of unspooling and connecting — no measuring, no cutting, no crimping.

From bulk spools to plug‑and‑play

Think of it this way. In a traditional installation, you’re essentially setting up a miniature cable assembly factory in a field. You need trained personnel, calibrated tools, weather protection, and quality control. Any of those factors slips, and you introduce a long‑term reliability risk.

In a harness‑based installation, the factory work happens indoors under controlled conditions. The on‑site crew simply positions the harness, plugs in the connectors, and moves to the next row. One study of a 370 MW solar farm found that using harnesses reduced the total length of LVDC cable required from 4,200 km to 2,800 km — a 33 % reduction in cable materials alone.


The real cost equation — why upfront price isn’t the whole story

Here’s what procurement managers often ask: “A pre‑assembled harness costs more per meter than bulk cable. Why would I pay that?”

Let’s break down total installed cost, not material cost. Traditional on‑site cabling includes the bulk cable itself, plus crimp connectors, plus labor hours for cutting, stripping, crimping, and testing, plus material waste from inaccurate cutting, plus rework costs when connections fail field testing, plus long‑term risk of poor crimps causing arc faults or hot spots.

Pre‑assembled harnesses shift cost from field labor to factory labor — and factory labor is both cheaper and more consistent. Studies show that harnesses reduce total system cost by 20–30 %, with the savings coming primarily from reduced labor hours, fewer installation errors, and shorter project timelines. For a 50 MW project, that difference can be millions of dollars.

On a real 370 MW installation, using harnesses cut the LVDC capital cost by 15 % and reduced cable length by one‑third. The harness cost more per meter, but the project used fewer meters and vastly less labor.

Where the savings come from

Three main drivers. First, installation speed. Harnesses operate on a plug‑and‑play principle — lay the harness, connect the modules, done. Some suppliers report installation time reductions of 50 % or more for string wiring using pre‑assembled systems. Second, material efficiency. Factory‑precise length calculations eliminate the 5–10 % waste typical of field cutting. Third, quality consistency. Every factory‑crimped connection is documented; field‑crimped connections are only as good as the technician‘s fatigue level on that particular afternoon.

For EPCs bidding on fixed‑price contracts, that predictability — knowing exactly how many labor hours each megawatt will require — is as valuable as the raw cost savings.


How custom design works — and what you need to provide

Solar farms are not off‑the‑shelf products. Row lengths vary, tracker spacing differs, combiner box locations shift during civil works. A harness that’s off by a meter creates more problems than it solves.

Good harness manufacturers work from your project’s actual layout drawings. You provide the string layout, module positions, and combiner box locations. Their engineering team runs cable routing algorithms to calculate exact branch lengths, trunk lengths, and connector placement. The result is a harness set where every branch reaches its designated module without slack or tension.

Customizable parameters include: cable gauge (typically 4 mm² to 16 mm² for DC power), trunk length, branch spacing and count, connector type (MC4, Amphenol, Staubli, or other certified PV connectors), overmolded fuse protection (2 A to 65 A), and labeling scheme for field identification.

Common branch configurations for large‑scale PV

Configuration Typical Use Number of Inputs Number of Outputs
Y‑branch (1-to-2) Splitting one trunk into two branches 1 2
X‑branch (2-to-2) Pairing two strings 2 2
T‑branch Dropping a branch mid‑run 1 (trunk) 2 (trunk + drop)
Multi‑string (3-to-1, 4-to-1) Combining multiple strings before combiner box 3 or 4 1

For ground‑mount systems with long tracker rows, the trend is toward “trunk with drop cable” architectures — a main trunk cable runs the length of the row, and branch connectors tap off at each module position. This reduces the number of individual cable runs and simplifies wire management across the site.


Certifications and quality — what the safety labels really mean

When you’re buying thousands of harnesses for a utility‑scale project, you can’t visually inspect every crimp. That’s why certification matters. Here‘s what to look for.

UL 9703 is the North American standard for distributed generation wiring harnesses. It covers everything from cable insulation to connector retention to flame resistance. A harness certified to UL 9703 for 1500 V DC has passed rigorous factory production testing. Some suppliers also hold ETL certification to UL 9703 across 600 V, 1000 V, and 1500 V systems.

IP68 waterproof rating means the connector assembly is dust‑tight and protected against continuous immersion. For exposed outdoor installations — ground‑mount PV always counts — this is non‑negotiable. The Suntree DC 1500 V Y Branch harness carries an IP68 rating and UV‑resistant materials rated for 25+ years outdoor exposure.

Operating temperature range. Real solar farms see everything from desert heat to alpine snow. The Suntree harness operates from –40 °C to +85 °C, covering essentially any environment where PV is deployed.

How to verify quality before you order

Any supplier can claim “high quality.” Ask for three things. First, the UL 9703 certification file number — verify it‘s active. Second, test reports for insulation resistance and dielectric withstand voltage for the specific harness configuration you’re buying. Third, a sample harness for physical inspection. Check that the overmolding fully encapsulates the wire-to-connector transition — no exposed conductor, no gaps where moisture can wick in.

Some suppliers offer free samples specifically for physical verification, reducing selection and technical risks. Take advantage of that.


Maintenance — what you actually need to inspect over time

Pre‑assembled harnesses are not “set and forget.” Like any electrical system component, they require periodic inspection.

At a minimum, schedule quarterly visual inspections. Look for abrasion where cables rub against module frames or racking. Check that cable ties and clips remain secure — loose cables chafe over time. Inspect connector housings for cracking, especially in high‑UV environments where plastics eventually degrade.

Every 12 months, perform insulation resistance testing on a representative sample of harnesses. A significant drop in insulation resistance suggests moisture ingress or cable damage. For critical systems, some asset managers also conduct thermal imaging of connectors during operation — a hot connector indicates high resistance and potential failure.

Most manufacturers provide specific maintenance guidance. The key point: a well‑designed harness simplifies maintenance because cable routing is consistent and connections are uniform. Troubleshooting becomes easier when every string follows the same pattern.


More questions from the field — FAQ

Q: Is a solar harness more expensive than loose cable?
A: On a per‑meter basis, yes — factory assembly costs more than bulk cable. But total installed cost is 20–30 % lower once you account for reduced labor hours, lower material waste, and shorter project timelines. For a typical 50 MW project, the difference can exceed $500,000 in labor savings alone.

Q: Can I add extra branches to an existing harness?
A: No — and you shouldn’t try. Harnesses are manufactured as complete assemblies. Adding a branch in the field means cutting the trunk, stripping insulation, and installing an inline tap connector. That introduces exactly the kind of field‑termination risk that harnesses are designed to eliminate. If your site layout changes after the harness order, you reorder new harnesses with the updated configuration. That’s why good suppliers build flexibility into the ordering process — batch releases so you can adjust quantities as civil work progresses.

Q: What’s the typical lead time for custom solar harnesses?
A: For a utility‑scale project (100 MW+), lead times typically range from 4 to 8 weeks after final engineering approval. Some suppliers offer expedited prototyping in 1–3 days for sample verification, but full production volumes require longer. The critical path is often engineering — the more complete and accurate your layout drawings are, the faster the manufacturer can produce cut sheets.

Q: What voltage rating do I need for modern utility‑scale PV?
A: The industry standard has shifted to 1500 V DC systems for large ground‑mount installations, as higher voltage reduces line losses and allows longer string lengths. Ensure your harness is certified for 1500 V DC — not just 1000 V. The Suntree SH Series and Y Branch products are qualified in TÜV and ETL labs to both IEC1500V and UL1500V standards.

Q: How do I protect harnesses during construction?
A: Harnesses arrive coiled in protective packaging. During installation, keep them elevated off the ground to avoid abrasion from dirt and rocks. Avoid running cables across walkways where equipment traffic can crush them. After installation but before energization, perform a continuity test on each string. Some contractors use temporary lockout devices on connectors during construction to prevent accidental mating before all testing is complete.

Q: Are aluminum cables ever used in solar harnesses?
A: Yes, increasingly. Aluminum is lighter and less expensive than copper, though it requires larger gauge for equivalent ampacity. Some harness designs use aluminum for trunk cables — where low voltage drop is critical over long distances — and copper for branch drops to individual modules. The Suntree solution uses high‑purity copper cores as the standard conductive material, but hybrid designs are available for projects focused on material cost reduction.


How Suntree’s DC 1500 V Y Branch simplifies large‑scale PV wiring

Now let‘s connect the principles to an actual product line. Suntree’s DC 1500 V Y Branch Solar Harness is a pre‑assembled wiring solution designed specifically for utility‑scale and commercial PV installations. The Y‑branch configuration — a single input trunk splitting into two output branches — is the workhorse of string combining, allowing two module strings to be connected efficiently without combiner boxes.

The harness uses high‑quality materials that ensure long‑term reliability: lower contact resistance and higher current transfer capability improve overall system efficiency. The IP68 waterproof rating means the assembly survives rain, snow, pressure washing, and even temporary submersion — a necessity for outdoor PV. Operating temperature spans –40 °C to +85 °C, covering desert, alpine, and coastal environments.

Rated voltage is UL1500V/IEC 1500V, with maximum rated current of 70 A for the Power Y Branch and 50 A for the SH Series, supporting cable sizes from 4 mm² to 16 mm². TÜV and ETL laboratory qualification confirms compliance with solar professional standards.

From a procurement perspective, Suntree offers support across the entire project lifecycle: 24/7 technical support for critical issues, free samples for physical verification, and service centers and local warehouses in multiple locations worldwide. For an EPC managing a 100 MW ground‑mount installation, the combination of certified 1500 V components, IP68 protection, and global logistics makes this harness platform worth evaluating.

Before you commit to a bulk order, request a sample harness and run it through your own quality checks: connector retention force, cable marking legibility, overmold integrity. A few hours of validation now prevents years of field failures.

Specifying solar harnesses for your next utility‑scale or commercial PV project? Contact Suntree for design consultation and a custom harness quote. Provide your system voltage (1000 V or 1500 V), cable gauge requirements, branch configuration preferences, and project layout — their engineering team will return optimized cut sheets and pricing for your specific site.

Common Causes of Solar Connector Failure and How to Fix Them
Jun 03,2026
Common Causes of Solar Connector Failure and How to Fix Them

A 500 kWp solar project catches fire six months after commissioning. The root cause is not the panels or the inverter—it is a single Solar Connector crimped with slip‑joint pliers rather than a proper crimping tool. This story is not unusual. Data from European fire investigations show that connectors were implicated in 24‑27% of solar‑related fires. In Germany, connectors caused 24% of 180 PV‑related fires between 1995 and 2012. Each connector failure can take a full string offline, with median repair downtime of 191 hours. A Solar Connector failure is rarely a mystery—it follows predictable patterns: overheating from a poor crimp, corrosion from water ingress, or arcing from mismatched brands. This guide walks through the three most common failure modes, how to identify each in the field, and the practical fixes that restore reliability without rewiring entire arrays.


Poor Crimping – the #1 Overheating Risk

The single most common cause of Solar Connector failure is a crimp that was never properly made. A poor crimp creates high contact resistance at the metal‑to‑metal interface. When current flows, the joint generates heat according to P = I²R. At 8 A through a 50 mΩ joint, that is 3.2 watts of heat concentrated in a few square millimeters, raising the contact surface temperature above 150 C. The plastic housing softens, the seal degrades, moisture enters, corrosion accelerates, and resistance climbs further—a self‑feeding cycle that ends in melted housing or fire.

Symptoms of a poor crimp include: Intermittent string operation (connector works sometimes, fails others), connector body that feels hot to the touch under normal sunlight, visible discoloration or melting around the crimp barrel, and irregular voltage readings that cannot be traced elsewhere.

How to diagnose. Measure contact resistance across the mated connector pair using a milliohmmeter. A reading above 0.5 mΩ is suspect; readings above 1 mΩ indicate a failed connection. Perform a pull test on the crimped cable. IEC standards require a minimum pull force of 310 N for a 4 mm² (approx. AWG 12) solar cable. If the cable pulls out of the crimp terminal under moderate hand force, the crimp has failed.

The fix. Cut off the damaged connector, strip the cable to the specified length (6–8 mm for most MC4‑compatible connectors), and recrimp using a ratcheting crimp tool with hexagonal dies and at least 1,500 lbs of crimping force. Never use pliers, standard wire strippers, or non‑spec tools. After recrimping, perform another pull test to confirm the connection holds.


Water and Moisture Ingress – the Corrosion Failure 

Water ingress is the second most common failure mechanism—and the most deceptive because the damage may take months to appear. Connectors are rated IP67, meaning they are dust‑tight and protected against temporary submersion. But that rating only holds when the connector is properly assembled and the sealing components are intact. Common causes of water ingress include missing or damaged O‑ring seals, cable gland nut not tightened to the specified torque (2.5–3 N·m), cracked connector housing from UV exposure, improper cable stripping (insulation pushed into the seal area), or connectors left unmated in the field, allowing dirt and moisture to enter the exposed halves. Once moisture enters, galvanic corrosion begins at the contact interface, increasing resistance and generating heat. The corrosion can also migrate along the stranded copper conductor, damaging cable sections beyond the connector itself.

Symptoms of water ingress include: visible green or white oxidation on contact pins, erratic string readings that fluctuate with humidity or rainfall, intermittent ground fault alarms, and connector body that feels warm even under light load. Field reports show that 79 % of identified high‑risk connector issues exhibit no detectable thermal anomaly at the time of inspection—meaning connectors can be on the verge of failure without any thermal warning. High‑resolution visual inspection of the connector body, seal condition, and pin surface is therefore critical.

The fix. For minor corrosion (light discoloration without pitting), disconnect the pair, clean the contact pins with electrical contact cleaner and a soft brush, inspect and replace damaged O‑rings, reassemble, and torque the gland nut to 2.5–3 N·m. For severe corrosion (pitting, green crust, or blackened contacts), cut off the entire connector and replace it with a new one. In cases where corrosion has traveled up the cable, cut back the cable until clean, bright conductor is visible before installing a new connector. Never apply dielectric grease to the contact pins themselves—it acts as an insulator. Instead, use a small amount of non‑conductive silicone grease on the O‑ring seal only.


Mating Incompatible Brands – the Invisible Arc

Different manufacturers design their connectors to the same basic specifications, but pin diameter tolerances, contact spring force, and locking mechanism geometry vary. When a connector from Brand A is mated with a connector from Brand B, the fit may be mechanically acceptable but electrically compromised. The male pin may be slightly undersized, the female contact spring may apply insufficient force, or the locking clip may not fully engage. The result is intermittent contact, micro‑arcing, and rapidly increasing contact resistance.

Symptoms of brand incompatibility include: random string tripping with no apparent cause, voltage fluctuations that disappear when the connectors are wiggled, melted connector housings at the mating interface (not at the crimp), and connectors that mate with less audible “click” than usual.

Why it happens. Even if connectors are advertised as “MC4‑compatible,” the critical dimensions vary. Pin diameter tolerances differ by up to 0.2 mm between manufacturers. A pin that is 0.1 mm undersized creates a loose fit; the contact spring cannot compensate, and the contact points are reduced from a full surface to a few small spots. The current concentrates at those points, generating localized heating that may not be detected by thermography until failure.

The fix. The only reliable solution is to replace the entire string’s connectors with a single brand. Never mix brands on the same string. If budget constraints prevent a full replacement, use a manufacturer‑approved adapter that has been tested for compatibility, but understand that each additional connection introduces another potential failure point. For new installations, specify that all connectors must be from the same manufacturer, and document brand information on the as‑built drawings.


Diagnosing a Failing Connector in the Field

Field diagnosis combines visual inspection, electrical measurement, and—when available—thermal imaging. However, thermal imaging alone is insufficient: 79 % of high‑risk connector issues show no detectable thermal anomaly at the time of inspection. High‑resolution visual inspection of connector housings, seals, and contact pins must complement any thermographic scan. The IEA recommends performing thermography in early morning or late afternoon when solar radiation is low, to improve detection sensitivity.

Use a milliohmmeter to measure contact resistance across mated connector pairs. A reading below 0.5 mΩ is acceptable. Readings between 0.5 and 1 mΩ warrant scheduled replacement; readings above 1 mΩ indicate immediate replacement required. Perform a visual inspection checklist: Are the locking clips fully engaged? Is the cable gland nut tight? Any cracks, discoloration, or melting on the housing? Any corrosion on the pins? Any insulation shrink‑back exposing conductor near the crimp? If the connector housing is cracked or melted, the entire assembly must be replaced. If the locking clip is broken but the housing is intact, replacement is still necessary—a connector that can vibrate apart is a safety hazard.


Preventive Measures for Long‑Term Reliability

Crimp pull test after every termination. Immediately after crimping, before assembling the connector housing, perform a pull test. Secure the crimp terminal and pull the cable with moderate force. If the cable moves or pulls out, the crimp has failed. Recrimp or cut and restart. Record pull test results in a quality log.

Torque the gland nut to specification. Use a torque wrench or calibrated screwdriver set to 2.5‑3 N·m. Hand‑tightened nuts loosen over thermal cycles and allow moisture ingress. Under‑tightening compromises the seal; over‑tightening can crack the plastic housing.

Keep a connector replacement log. Record the date, location, failure mode (overheating, corrosion, mechanical damage), and corrective action for every replaced connector. This log helps identify recurring issues with specific equipment or installation practices and supports warranty claims when connector batches have manufacturing defects.

For new builds: pre‑crimped cables reduce risk. Factory‑pre‑crimped cables remove the most error‑prone field process. The crimp is performed in a controlled environment with calibrated equipment and includes a documented pull test. For large projects, the marginal cost increase is quickly recovered in reduced commissioning failures and lower O&M spend over the first year.


Questions from the Field

Q: Can a burned solar connector be repaired or must it be replaced?
A: Replace immediately. A connector with melted housing, carbonized pins, or visible arc damage cannot be reliably repaired. The plastic has lost its mechanical and dielectric properties, and the contact surface is permanently degraded. Cut it off, strip fresh cable, and install a new connector.

Q: How often should connectors be inspected in a desert PV farm?
A: At least once every six months, or quarterly during sandstorm seasons. Desert environments accelerate UV degradation of connector housings and abrasive wear from wind‑blown sand. A 2024 NREL study analyzing over 50,000 O&M tickets found that each connector failure takes a full string offline, with mean replacement downtime of 1,579 hours. Regular inspection is significantly less expensive than string downtime.

Q: What is the correct torque for a solar connector coupling nut?
A: Tighten the cable gland nut to 2.5–3 N·m. Over‑tightening can crack the plastic housing; under‑tightening compromises the IP67 seal. Use a torque tool, not hand feel.

Q: Can aluminum solar cable be used with standard copper connectors?
A: Not directly. Aluminum and copper have different thermal expansion rates and form galvanic cells when directly connected, leading to increased contact resistance and corrosion. Safety regulations prohibit direct aluminum‑to‑copper connection. The PMCN Connectors for Al cables from Suntree are specifically engineered to accommodate aluminum conductors, minimizing contact resistance and reducing the risk of thermal hotspots, while ensuring compatibility with standard copper components.


When to Replace vs. Repair 

Repair when: minor surface oxidation is present without pitting, the housing and seals are intact, the connector has never overheated, and a pull test confirms proper crimp retention. Clean the contacts with electrical contact cleaner, replace O‑rings if damaged, reassemble, and torque to spec.

Replace when: any visible melting or cracking of the housing appears; the contact pins show pitting, deep discoloration, or carbonization; the locking clip is broken or does not engage with a crisp click; the cable gland nut cannot be torqued to spec without the housing deforming; the connector has been involved in an arc event; or a pull test fails. In these cases, cut back to clean cable and install a new connector. For every $2 connector that fails, the potential cost includes string downtime, lost production, and fire risk.

Proactive replacement schedule. For connectors in high‑stress environments (desert heat, coastal salt spray, high vibration), consider proactive replacement every 5‑7 years, or earlier if annual inspection shows seal hardening or contact wear exceeding 20% of original material thickness.


Connectors Designed for Demanding Environments

When a Solar Connector must withstand years of field service without developing the failures described above, the engineering behind the connector—from contact material to sealing design to compatibility engineering—determines long‑term reliability. Suntree manufactures the PMCN Connectors for Al cables, specifically engineered for photovoltaic systems where aluminum conductors are used for cost‑effective cable runs. These connectors are designed for compatibility with both copper and aluminum conductors, minimizing contact resistance and reducing the risk of thermal hotspots. They feature IP67‑rated sealing for outdoor durability, UV‑resistant housing materials rated for 25+ years of outdoor exposure, and compatibility with standard MC4‑style locking mechanisms and disconnect tools. Suntree’s engineering ensures that the critical interface—pin diameter, contact spring force, and sealing geometry—meets or exceeds industry standards, reducing the failure modes that plague field‑assembled systems. For operators managing large‑scale PV plants, using connectors that are purpose‑built for the conductor type and environmental conditions is the single most effective preventive measure against connection failures.

→ Request a quote from Suntree for the PMCN Connectors for Al cables — Share your project type (utility, commercial, residential), conductor gauge and material (copper or aluminum), and environmental conditions. Their technical team can recommend the right connector configuration and provide torque specifications for your specific cable.

GET A QUOTE

GET IN TOUCH NOW
Captcha Code